")

")


Como criar a planta perfeita - Parte 1
The lessons of 2010 and the plans for 2011
Lessons about roots
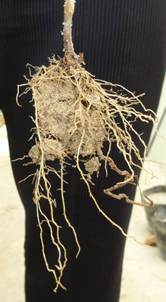
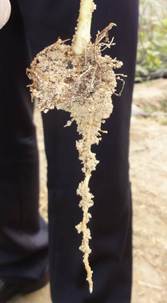
The experiments that have been started in 2010 have given us a lot of practical information. This information will help us improve the results of our experiments during 2011. As explained very well in the website, on http://www.groasis.com/page/uk/saplings.php and on http://www.groasis.com/page/uk/material.php, the key to a planting success is a good root. The Groasis waterboxx is a tool to help this root, but if we plant trees with destroyed, horizontal or upwards growing radicle roots, the future success of any plantation – with or without box - will disappoint us. A plant without good radicle roots is not able to penetrate dry or rocky soil. In the two mentioned links you can learn how to distinguish good from bad roots therefore I strongly recommend to study these pages and especially the photos. I have seen that the box is able to help survive saplings with bad radicle roots in the first year. It seems then that the success rate of planting is high. However, the real capacity of the plant to survive in eroded or rocky areas is only first proven once we take the box off. If then the tree survives and grows, we have a good result. This is only possible if the tree, bush or vegetable has developed a perfect radicle root.
Lessons about seed
In order to get good radicle roots I have done various plantations with seed. The problem with seed is however, that one does not control the germination. Sometimes the seed is only 30 or 40% fertile, or, once germinated, the sprout dries out or is eaten by an animal. It also happens that the seed stops germinating – even when it is soaked – once it is confronted with high temperatures. This is just a protecting mechanism that stops the seedling from dying when it is too hot or dry and the processes restart once temperatures drop. It is also difficult to sow the seed on its preferred depth. Some seeds like a sowing depth of 1 cm (0.4 inch) and others of 3 cm (1.20 inch) . There is none or little knowledge on this subject, but in the past when I sowed vegetables I learned that red beets needed to be sown at least 2 cm deep and chicory absolutely not deeper than 1 cm. If you sowed the red beet on 1 cm deep it didn’t germinate and if you sowed the chicory on 2 cm, it also didn’t. As we sow the tree seeds without any knowledge about their depth preference and as we do not control the depth on which we sow, we get unpredictable results that are not acceptable.
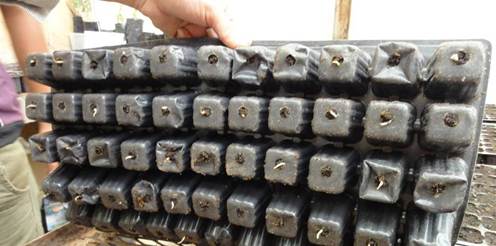
The best planting material
The best planting material up to my experience until now is seed that has just germinated under controlled circumstances. The best stage is when it has developed its radicle root, but it has not developed its leaves. This way you are sure that you plant a seed that is certainly germinated. You are sure that it has a radicle root that is able to penetrate a dry or rocky soil and that the non-existence of leaves guarantees that no evaporation happens yet. On the next page you find some pictures of pre-germinated Argana spinosa.
Improve your soil medium
It is very good to add Mycorrhizae in the soil mix in the greenhouse to inoculate the roots when germinating or when producing cuttings. This allows colonization on the roots and is an easy way to insure Mycorrhizae are present at planting. Trichoderma is also good to add in the soil medium as it is a good microbe that combats bad fungus. To help keep humidity in the soil medium during the transport phase you can use a product like Zeba http://www.zeba.com the greenhouse mix to help keep the transplant soil moist as it establishes and while plants are transported to the planting site.
Well germinated seed wit almost no leaves yet = no evaporation
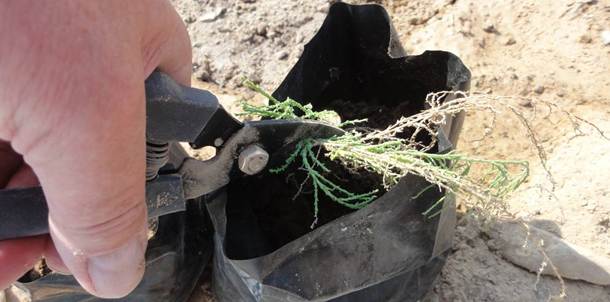
Good developed radicle roots on seed
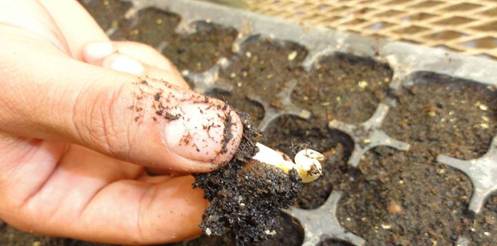
Detail of pre-germinated seed.
Rooted cuttings
Aside of seed we are also able to make cuttings with perfect roots. If we produce them in the right way we can produce them with still undivided radicle roots. Here below are a few examples of perfectly rooted cuttings from Olive (Olea europaea).
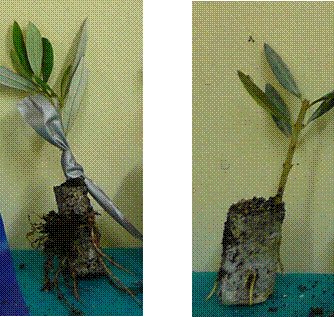
The two photos above show that it is possible to produce perfect radicle roots with cuttings.
The photos below show the difference in root structure between seedlings and cuttings
Cutting of Terminalia catappa Seedling of Terminalia catappa
Notice the difference in radicle root structure and strength.
The radicle root of seed is thicker and stronger.
Future plant material production
I expect that within 10 years from now Porto-Greenhouses, near the planting place, will produce 250 plants per m2 per each 2 months. These plants will have a leave evaporation surface that is as small as possible, combined with a root mass that is as big as possible. The roots will exist of one or more unsplitted radicle roots, white coloured so not infected by funguses, per plant. The present antique plant multiplication techniques produce plants with 20% biomass in roots and 80% biomass in leaves. These plants have a low capacity to ‘drink’ and a high loss of evaporation. The modern plant producer will produce plants that come closer to Mother Nature’s technique where a plant in the first year has 80% of its biomass in the soil and 20% of its biomass above the soil. This means a high capacity to ‘drink’ and a low quantity of evaporation.
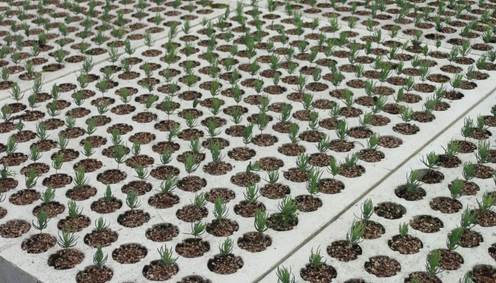
Future plant production in Porto-Greenhouses near the planting place
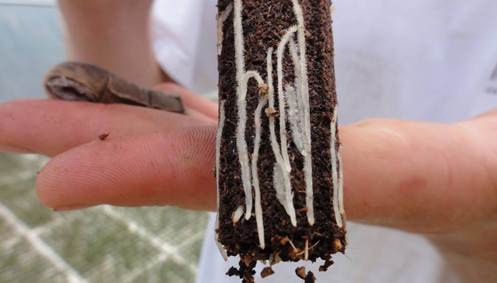
Modern plants must have 80% biomass in roots and unsplitted white radicle roots
Anti-evaporation
In order to reduce the evaporation, I have done trials pruning off the leaves while planting. This is rather successful and it doesn’t harm the growth.
 Prune them to 2 – 3 cm length
Planting depth
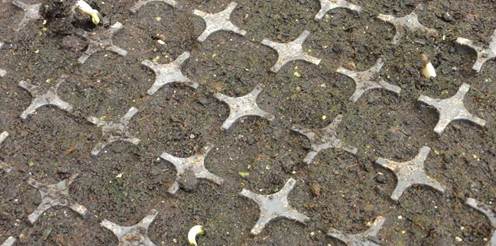
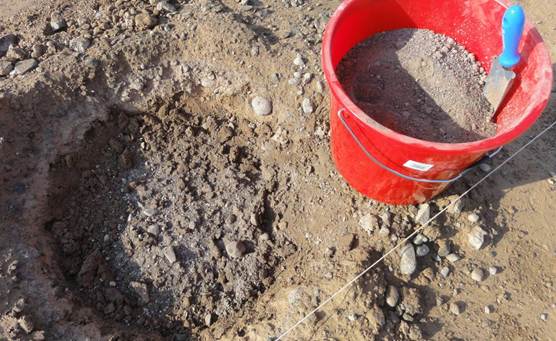
I learned that planting the boxes on top of the soil has a disadvantage: the wind can blow below it and dry the soil out. This means that the water gift of the box is lower than the evaporation caused by the wind. As a result the plant will not survive or have at least more stress to survive.

An example of an opening between the box and the soil
The solution against evaporation
Planting the boxes around 10 cm deeper works really well to solve this problem. Of course this must be done without destroying the capillary water transport system in the soil. This means that we cannot touch the soil that is lower than 10 cm. As soon as we destroy the structure of the soil, the internal transport system of water, but also all the mycorrhiza, will be destroyed. The roots need the mycorrhiza to ‘drink’ water and to ‘eat’ the minerals from the soil, so we need to be very careful with them.
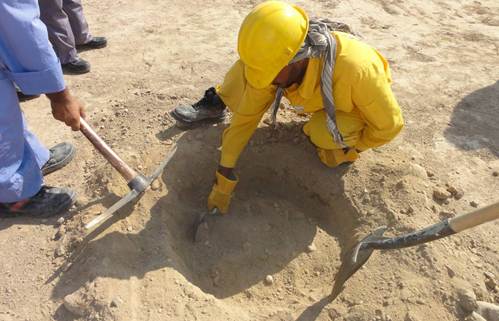
The planting hole by hand:

The planting hole with the Groasis capillary drill
How to place the box
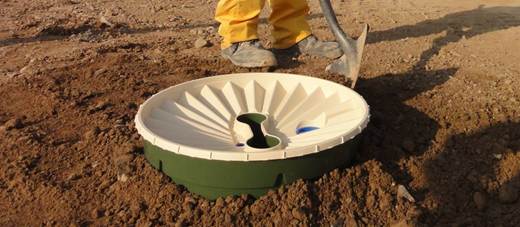
Cover the sides of the box against drying out
Conclusion on 2010
I have learned that the development of a perfect radicle root is crucial. Sowing seed directly on the final planting place in the box does give a perfect radicle root, however the germination percentage is too insecure to advise this method. Therefore I advise to sow seed under controlled circumstances and create plants with as few leaves as possible, in order to prevent evaporation, and a well developed, around 2 cm long, radicle root.
It is also possible to develop cuttings with radicle roots. The cuttings should be planted as soon as the developed roots are around 2 cm long. If the cutting has too many leaves that cause evaporation, just prune them until max 2 - 3 cm long.
At last we can conclude that planting results are better if we are able to avoid evaporation of humidity from below the box, caused by the wind. Put the boxes around 10 cm deep, without destroying the capillary structure below it, and cover the sides so that no wind can blow there and dry them out.
Mycorrhiza
Roots are not able to ‘eat and drink’ from the soil on their own. They need mycorrhiza or funguses to help them do this. I have not done enough trials to make reliable conclusions. But one can imagine that extremely dry soils have little quantities of active mycorrhizae. Theoretically adding some extra, should have strong positive effects. Once you add some of it they will grow and multiply fast because of the high humidity below the box in combination with the higher temperatures.
I advise you to do this in two ways: 1) buy mycorrhiza in the market and 2) collect some rotten leaves, humus and sand from below tree species and put some of this material in the planting hole below the box. In principle I want to collect this from the same specie as we are planting.
Two ways of adding mycorrhizae
A photo of mycorrhizae bought in the market

A photo of collected old leaves, humus and sand from below the same tree specie as planted
Extreme circumstances
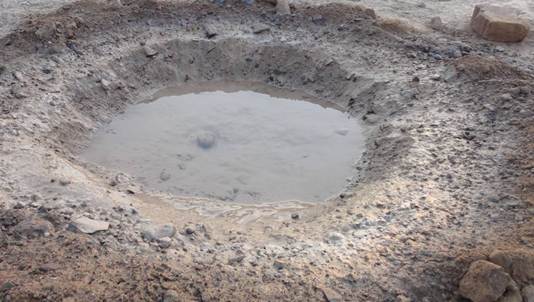
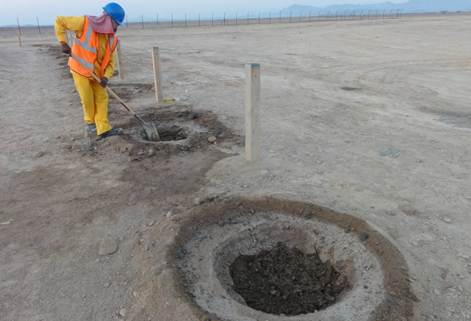
In January 2011 I was confronted with one of the worst circumstances for a planting experiment until now. It is a desert area in Oman that is being transformed into an industrial area. The soil exists of small rocks and a very fine type of dust in between it, almost like cement. The soil had been moved by bulldozers and shovels and all structure and capillary was destroyed. I decided to do another interesting experiment to try to make a success of this planting: fill the planting holes the night before with 30 litres (7 gallons)of water in order to speed up the restoration of the capillary column.
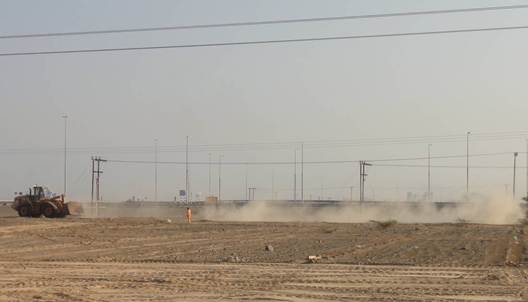
The challenging planting area
Rocks and cement-like dust
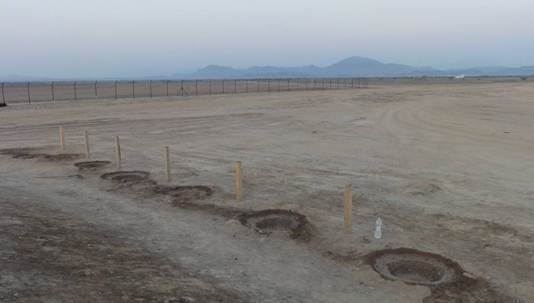
Fill each planting hole with 30 litres of water (7 gallons) the night before planting
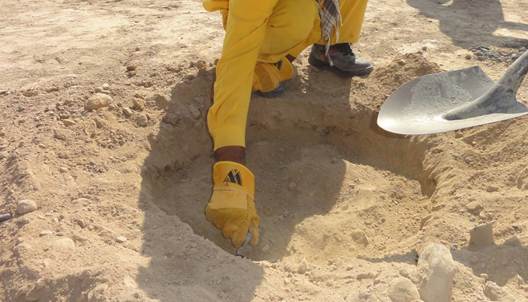
The dust causes bad drainage as it sludges the crevices between the rocks.
This means that it will be hard for the roots to find enough oxygen to grow.
The morning after we open the top of the soil to let oxygen enter
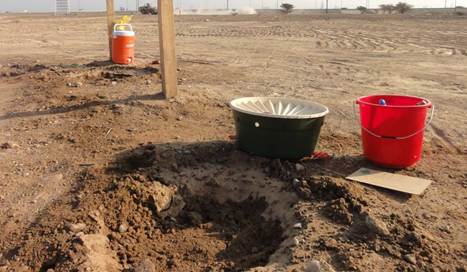
Ready to plant
Experiments in the year after planting
In Spain we have done plantations during the summer of 2010 on a rocky soil. We needed the capillary drill to make the planting holes. The trees have grown so well that in January 2011, 7 months after planting, they seem strong enough to survive on their own. We decided to take the boxes off. They were full with water. We added the water in the planting holes so that the capillary column gets well filled. Then we covered the planting holes with stones. I am sure that the stones have a cooling effect during the day and a warming effect during the night. They will also help the soil to let enter sufficient oxygen in order to stimulate the growth of the roots. Perhaps they also get wet in the morning and cause some condensxation that might drip in the planting hole. I think these experiments are very exciting and at the end of 2011 we know the effect of this experiment.
June 2010
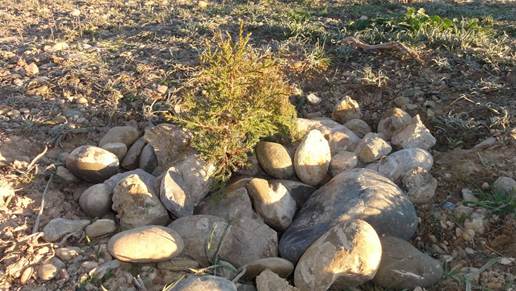
January 2011
Plans for 2011
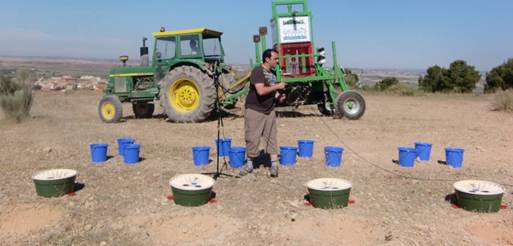
During 2011 the planting experiments will continue. The focus of the experiments is planting pre-germinated seed with a perfect radicle root of preferably max 2 cm (0.8 inch) . We will also use cuttings with several radicle roots of preferably max 2 to 4 cm (0.8-1.6 inches) , but the leaves of the cuttings will be pruned while planting to reduce evaporation. In general we will try to use 50% of the boxes with mycorrhizae insemination. In March 2011 we will start to use the second prototype of the capillary drill in Spain. In this country we will do an experiment following 30,000 biodegradable boxes from 2011-2015. During the year several trials with vegetables will be planted. At last I advise the reader who starts to do its own experiments to take some time to study the photo albums on the website.
Read more about our technology in How to create the perfect plant - Part 2
Pieter Hoff
CEO AquaPro Holland